SILVER AND WHITE COLLECTION UPDATE

1 05 2012

Upcyclers are often pickers

with a hunger to express themselves through design.

In  previous posts, I discussed the value of designing collections.

Click:  DESIGN YOUR OWN COLLECTION

Click:  SOFA TABLE UPCYCLE

Click:  SPONGE PAINT IT

My last post was an easy tutorial called NIGHTSTANDS RENEWED

The above posts featured easy upcycles on furniture and home decor items

 I sell from my spaces at

Pickers Paradise Mercantile & Auction House in Medford, OR

I’m happy to announce

that all of the pieces in the silver and white collection

sold to one customer yesterday.

Here’s how the customer saw them:

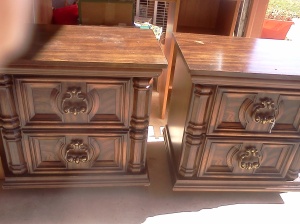
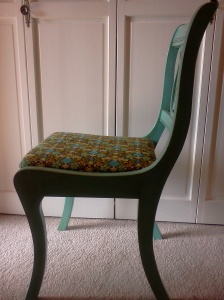
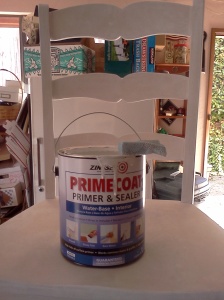
We used to be brown with faux brass handles ~
Until we became white with silver handles

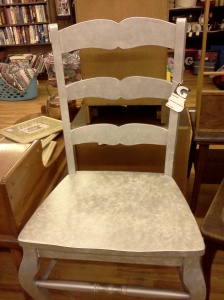
From worn & cream~
To smooth & metallic silver over white

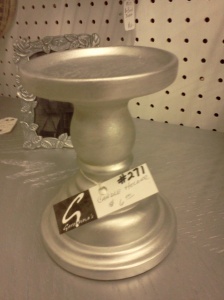
I was drab tan ~
Until I became Regal Silver

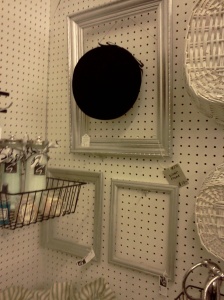
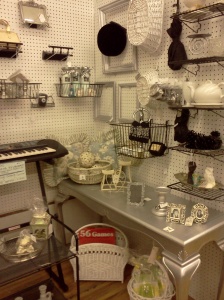
 Other pieces of the collection ~

Once Pea Green ~
Now Metallic Silver

Add a few accent pieces
Repeating the colors of your collection

Prior to upcycling these pieces were purchased from different sources.

All of them were different in style and in color.

Now they are a collection!

I did it.  You can too!

With this collection sold,

I am working fast and furious to produce a new collection.

Stay tuned to find out what pieces I am choosing and what colors they will become!

Many Blessings !

~Gerean


NIGHTSTANDS RENEWED

27 04 2012

I won the bid on this dated set of nightstands

at the March Picker’s Paradise Auction.

Here’s the “After” Shot ~

NIGHTSTANDS RENEWED BY GEREAN

I saw the potential immediately.

A simple renewal was in order.

 Here’s a basic “How To.”

Lightly sand the exterior.

Look!  The furniture angels sent me a little love note via the old finish.

Wipe with a damp cloth to remove excess grit/dust.

Remove hardware.

Sand & prime hardware.

Sand & prime furniture surfaces.

I use Zinnsers Water Base Prime & Seal to prime practically everything.

Spray paint the furniture.  It took two coats.

I used Rust-oleum Universal Satin White Spray Paint.

Spray paint hardware.   Two coats.  I used Rust-oleum Specialty Metallic Spray Paint

Reattach the hardware.

Ta-dah!

NIGHTSTANDS BEFORE

NIGHTSTANDS AFTER

They’re on their way to be sold at:

Picker’s Paradise Mercantile & Auction House,

3404 S. Pacific Hwy., Medford, OR

It was an easy makeover!

I did it!  You can too!

Many Blessings!

~Gerean


MAKE PRETTY THINGS

21 04 2012

Just a reminder ~

Every surface is a canvas waiting to be created upon ~

Do what you love ~ Love what you do

I do.  You can too!

SIDEWALK STATEMENT by Gerean

Many Blessings !

~Gerean


OLD FRAMED PRINT BECOMES CHALKBOARD

19 04 2012

I purchased a damaged-beyond-repair framed print

 from one who was in need.

Originally, I hoped to repair the damage,

but it was too far gone.

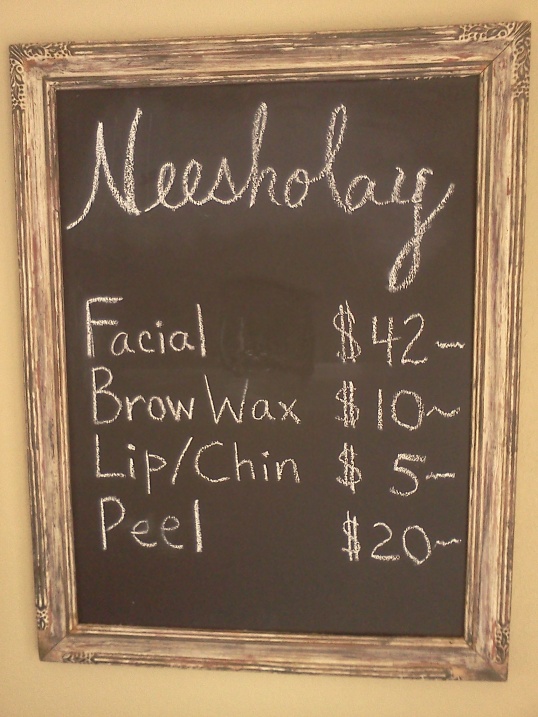
My daughter had been asking me to provide a large chalkboard for her business.

It took a bit of time for it to occur to me

that I had a chalkboard in the making.

I carefully removed the hard-board print

from the multi-colored, chippy frame.

Grabbed my paintbrush & my chalkboard paint ~

 One coat of chalkboard paint to cover the entire surface of the print.

Use brush strokes as long and straight as possible.

Let the first coat dry over night.

Add a final coat.

Let dry for 48 hours before using.

CHALKBOARD by Gerean
For NEESHOLAY SKIN CARE

Note:

I tweaked the frame color a little

to match the black accents in my daughters spa.

Just a little black chalkboard paint on a cloth ~

Removed excess paint from cloth ~

Dry-brushed over raised areas of frame ~

Giving it a darker, aged, smokey look.

My daughter loves it!

It’s hanging in her spa:

Neesholay Skin Care

Medford, OR

It was easy!

I did it.  You can too !

~Gerean


TWELVE STEPS TO MIDDLE GROUND

27 03 2012

I realize that it cannot be a simple task, for a single, self-employed, fifty-something-year-old woman, living during a recession, in a small town in a northwestern, “wilderness” state, to start two new businesses with individually linked online stores, Facebook pages and         Blogs . . . with a capital of . . . well . . . no capital.  The challenges are monumental.  The days are long, long, long.  Paperwork is all over the place.  The stress-inducing details endlessly scream out to be handled, “Me first,” “Noooo me,” “I’m a priorty,”

In the face of life choices, like mine, one must simply continue to move forward, put one foot in front of the other, remembering that it’s the baby steps that will get one there.  Gotta continue to believe, hope and progress.     And . . . I’m good with that.  I’m willing to do what it takes to make a unique mark on my own life, subsequently the lives of others.  I’m accepting of the hard work, the challenge, the stress, the uncertainty . . . the edge.  However, I am stating for the record that  . . . last week sucked MAJORLY.

I’ve been ruminating all of the details of last week . . . It’s my way . . . spinning it all around in my head, looking at it this way, that way, the other way, under it, over it, etc. . . living in a mental state of impossible resolution until eventually, I succumb to the reality that I must look . . . right through it.   I find my balance, shift my thinking and emerge somewhere in my-own-perception of . . . the middle.  The longer I live on this earth, the more quickly I am able to do this.

I woke up this morning finding myself noticeably closer to the middle enough to ask my-own-self, “How’d you do that?”  How did I find my balance in such a relatively short amount of time?

1)  Think as much as you need to, but while you’re thinking, remember to question each thought.  Thoughts . . . they happen.  They can be your best friend, or your worst enemy.  A negative thought that is believed, becomes one’s reality.  Believing the thought that it cannot be done, that it is an impossible task, that you don’t have what it takes, etc. . . . these thoughts can only bring you down.  Continue to exercise a head-shift toward those thoughts that make you happy.  After all, what feels better, a happy thought or a sad one?

One of my favorite reads, TUT Notes from the Universe (by Mike Dooley), reminds me daily that,

“Thoughts become things, so . . . choose the good ones.”

2)  Excercise gratitude.  It becomes increasingly difficult to curse the roadblocks, when one is busy counting and being thankful for all blessings.

3)  Follow your joy. Do what you love ~ Love what you do.   The moment I try to force myself to achieve something that I do not find joy in, I end up on the familiar dead-end street of resistance.  Repeated trips to dead-end streets are the epitome of insanity.  Eliminate resistance.  Lower your insanity level.  Follow your joy.  Do what you love ~ Love what you do.

Emily Dickenson quote 5x7 Print at: http://www.3LambsIllustration.etsy.com

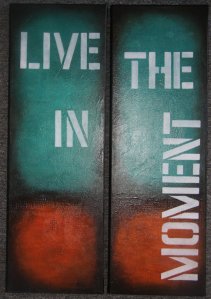
3)  Shake hands with the moment.  Just make friends with it.  Be at peace with it.  It is what it is.  It is all you have.  It is all you can bank on.  The past is gone.  The future is uncertain.  This moment is your opportunity.

4)  Imagine.  It’s so fun to do.  Write a screenplay of the life you desire in your head, let it drop to your heart and set yourself free.  You are the star of your own movie.  Make it a blockbuster.

5)  Breathe.  I struggle with this one.  I have a tendency to hold my breath when I’m focusing.  But everybody knows that the act of breathing centers us, brings us more fully into the moment and is an unparalleled force that is constantly at our disposal.

6)  If possible, exercise acceptance that . . . EVERYTHING happens for a reason, and in its correct time, whether or not we readily understand the reason . . . or the timing.  Don’t worry.  All is as its s’posta be.

It is true that last week, the thought that crept in, was one of impossibility and ultimate defeat.  It is also true, that I am back up.  And you know . . . along the journey, success is not about the ability to be better’n somebody else, it’s about cultivating the personal power to be willing to get back up for purposes of becoming better’n you actually were a moment ago.  I am.  You can be too.

8)  Primp.  It amuses me how many parallels can be drawn between the words “primp” and “pimp.”  Seems like the word “primp” is a feminine form (of sorts) of “pimp.”  Examples ~ She’s been in the bathroom primping for hours.  He’s out pimping his ride.  I don’t know, I’m no master in language.   I do, however, possess the talent to be a fairly gifted primper.  I see primping as an act of caring for ourselves.  Taking the extra time to decorate the exterior, does actually assist in my levels of confidence while mingling with fellow human beings.  Taking a little time to primp also causes me to slow down and focus on the importance of caring for the body.

9)  Put yourself out there.  When I was a child in Sunday school, we all sang a song called “This Little Light of Mine.”  The song talked about our Light and reminded us that our purpose was to illuminate.  We can’t do that if we don’t show up to the party.  In order to spread our light, we must step out and make a difference in the lives of others.  Light illumination is not always a walk in the park.  Be prepared to feel your way through the darkness at times.
10)  Keep your eye on your own MIDDLE GROUND.   We all visit the extremes from time-to-time, but it’s not prudent to move all your stuff in and live together.  My friend Karen has reminded me that . . . “Any strength taken to an extreme, becomes a weakness.”

11)  Accept Help.  Nobody goes it alone.  This past week an amazing number of people stepped up to the plate with the intention of taking a bit of the load off of me.  They miraculously appeared in the form of trusted technical assistance,  inspiration, encouragement and patience.  Nobody goes it alone.  Be willing to help ~ equally as important, accept help.

12)  Give up the fight for perfectionism.  Do your best and remind yourself that your best is enough.

Finally, commit to being continually willing and open to be inspired and to inspire others.  Create.  Share.  Intend to make a profound positive difference in the lives of others.  I do.  You can too!

Inspiration:  A feeling of enthusiasm you get from someone or something which gives you new and creative ideas.

Many Blessings ~

~Gerean


DUNCAN PHYFE CHAIRS

17 03 2012

A few months back, 4 Duncan Phyfe chairs miraculously appeared at a used furniture shop in Southern Oregon.  I recognized them immediately.  I am now the proud owner.

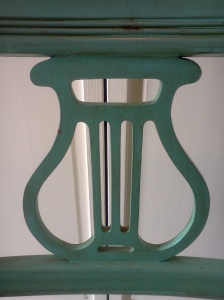
Duncan Phyfe Lyre Back Chairs

Although covered in a coat of turquoise paint, this set of four are in excellent condition in terms of stability.  They’re in need of no structural repair and are as sturdy as the day they were made.  Paint stripping and restaining are needed to restore these gorgeous Phyfe chairs back to their original elegance.

In the furniture industry, the term Duncan Phyfe is used to define an original Duncan Phyfe creation as well as the Duncan Phyfe style.  Duncan Phyfe, who manufactured up-scale wooden furniture from 1795 – 1848 , became known for signiture lines, shapes, architecture and woodworking methods.

Duncan Phyfe Furniture Architecture

A design element that was practically the logo of Duncan Phyfe is the lyre.

The Duncan Phyfe Lyre ~ Signature Statement

IDENTIFICATION

Makers Marks and numbering systems were rarely used by Duncan Phyfe.  Therefore, identification becomes tricky.  The experts look for elements that are consistently present in a Phyfe piece of furniture;  The type and quality of wood used, the architectural curves of the piece, the details, the legs, the chair backs and seat shapes and many other factors that can be found in Duncan Phyfe style.

Duncan Phyfe Curves

Duncan Phyfe furniture, most often made from Mahogany, a soft, dark, reddish brown wood.  However, there are examples of Phyfe furniture in other woods as well.

WHERE TO PURCHASE DUNCAN PHYFE

The Oregon Pick

Go Antiques by Worthpoint

Ruby Lane

eBay

Duncan Phyfe Chair Back

DUNCAN PHYFE REFERENCES

The Oregon Pick

The Metropolitan Museum of Art

Connected Lines

How to Identify Ducan Phyfe

Buffaloah ~ About Duncan Phyfe

The chairs depicted above are offered for sale for $465.00 as of 3/17/2012 at:  Oregon Pick on Etsy

Your comments, feedback, inquiries and the sharing of similar stories are very welcome.

~Gerean



DESIGN YOUR OWN COLLECTION

14 03 2012

Imagine attending an estate sale and finding a whole buncha mis-matched items that you love, but have no idea what to do with.  My work in the estate liquidation industry has helped me understand the benefit of designing “collections.”  Once I’ve purchased them, I need to liquidate them . . . or use them.  The problem is, they’re ugly together.  The solution ~ Design a Collection.

In this all-metallic-silver collection, I lightly primed each piece with a white primer/sealer mixed with a little bit of cream-colored paint, (The cream colored paint provided a warmth to the base coat).  Let primer dry.  Next, I either brushed or spray-painted each piece in Metallic Silver.  Voila!  An instant collection that is now for sale in one of my two spaces at Pickers Paradise Mercantile & Auction House in Medford, OR

The following photos depict items purchased and upcycled for very little money:

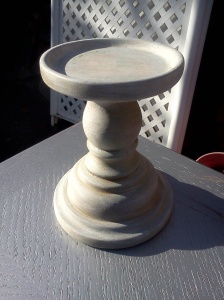
CANDLESTICK BEFORE (Primed)

 CANDLESTICK AFTER

 MEDIUM SIZED WOOD FRAME BEFORE (Primed)

 SMALL WOOD FRAME BEFORE (Primed)

 CANDLESTICK & TWO FRAMES AS A COLLECTION

WOOD CHAIR BEFORE

 WOOD CHAIR AFTER

TARNISHED BRASS DRAWER PULLS BEFORE

DRAWER PULLS AFTER (After cleaning, sanding, priming & painting)

Note:  These drawer pulls will show up in a future post, attached to two upcycled end tables.

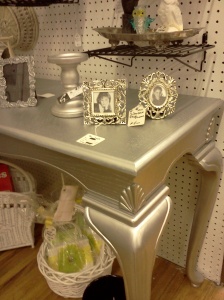
 SILVER PAINTED SOFA TABLE ~ PART OF THE COLLECTION ~ NO BEFORE PHOTO

ON THE WALL AT MY RESALE SPACE

 COLLECTIONS MAKE GOOD DESIGN ~ GOOD DESIGN SELLS !

I did it!  You can too!

~Gerean


SPONGE PAINT IT

14 03 2012

Restore, by Habitat for Humanity  is on my list of favorites for finding items to upcycle.  Recently while shopping there with my daughter, we found an over-sized, cream-colored chair that wore a finish that had seen better days.  The price tag read $20.00.  My daughter negotiated it down to $15.00.  Below find a tutorial that will help you easily turn plain into fabulous with a little primer, a little paint and a sponge.

BEFORE

TUTORIAL

Materials needed:

Zinsser Coat 2 (or other brand) Water based primer & sealer

Wide-weave or sea sponge

Water based Interior Paint ~ For first projects begin with any pale shade, but not white.

1)  SAND ~ Sand only if the original surface paint is raised or uneven.  Otherwise, skip the sanding (Yay!), a coat of primer/sealer will suffice.

2)  CLEAN ~ Wipe with damp cloth to assure that surface is free of dust, oil, etc.

3)  PREP ~ Cut sponge with scissors into a circular or oval shape.  The curves will prevent straight lines from appearing on the surface of your project.

4)  PRIME ~ Dip sponge in primer.  Remove excess primer from sponge.  I applied the primer with the sponge over the surface of the chair, leaving parts of the original paint showing.  In doing this, I created depth and texture.  If the original paint color is not to your liking, go ahead and lightly prime the entire surface.  Allow primer to dry.

Zinsser Prime Coat 2, Primer & Sealer, Water Base, Interior

5) PAINT ~  I used Martha Stewart Living Specialty Finish Metallic Paint (from Home Depot) ~ Color:  Polished Silver.

Paint the joints, under-surfaces, edges and if your project includes spindles, (like mine did), move your sponge in straight horizontal lines across the spindles, sponging the paint to cover these surfaces completely.

Continuing to make sure to remove excess paint, apply paint with sponge to remainder of surfaces, making sure you change the direction of the sponge each time you press down.  Don’t press hard ~ just a touch to the surface is all the pressure that is required.  I leave plenty of unpainted surface space each time I press, because when I go back to fill in the spaces I am able to balance the paint application.  I chose to leave a fair amount of the original, creamy paint color and the white primer to show through for this project.  I don’t worry if the sponge marks are a little thicker with paint in some places more than others ~this adds texture and interest.

AFTER

Metallic Silver Sponge-painted Chair

Now available for purchase for $52.00 at Pickers Paradise Mercantile & Auction House, Medford, OR

I did it!  You can too!

~Gerean 

Comments, questions and sharing are welcome!


SOFA TABLE UPCYCLE

14 03 2012

This wasn’t ugly, but it certainly wasn’t an attractive table when I purchased it at a used furniture store.  It’s been sitting in a myriad of places in the store for many months.  It was originally finished in a drab tan, but the architecture was good.  It kept calling to me.  Finally, I succumbed.  I sure am glad I did, ’cause I absolutely LOVE this table ~

I forgot to take the before photo, AND . . . am making major progress in this area.

TUTORIAL ~

1)   Lightly sand surface with fine-grain sandpaper

2)  Wipe surface dry with damp cloth to assure that all grit is removed

3)  Lightly prime surface  with a brush or sponge.  I use a sponge whenever I want detail or wood grain to be visible when the project is complete.  For this project, I used Zinsser Prime Coat 2, Primer & Seal ~ Water Base Interior

Because I prime multiple, large projects at a time, I purchase Zinsser by the gallon.

Cost:  $17 – 19 at a paint or hardware store.

4)  Allow primer to dry for at least two hours in temperatures above 60 degrees.  In colder weather allow primer to dry for at least 24 hours.

5)  Once primer is dry, I again wipe down with a damp cloth.

6)  Paint.  For best results use an interior, water-based paint or canned spray-paint.  Because the project has been primed, often you will be able to get by with one coat of paint.   I used Rust-oleum Specialty Metallic Silver Spray Paint because I wanted a brighter, more reflective finish.  However, any brand/color of paint will work for this project.  Because my project surface was porous, I applied one fine coat, allowed to dry overnight, then applied a second (final) thin coat.

Final result ~ A Hollywood Regency Style, Silver Sofa Table ~ Now for sale in my space at Pickers Paradise Mercantile & Auction House in Medford, Oregon.

I did it.  You can too!

~Gerean


LAVENDER SACHET

7 03 2012

My friend, Maureen grows bushel upon bushel of lavender each year.  She harvests it, separates out clean buds, jars it and gives it to friends.  Fortunately, she likes me a lot and delivers to me a lion’s share of locally grown, freshly harvested, organic, Oregon lavender.

I use the lavender in several ways.  I soak it for scent.  I add it to bath salts and handmade soaps, I wrap some in an envelope and leave it in my car as an air freshener.  Lavender makes one of the best sachets ever and is an affordable and appreciated gift.  Make up six organza bags filled with lavender buds, arrange in a small gift  box, add a bow . . . Voila!  You’ve created a gift for under $5.00 .

I purchase organza bags from ThatFinalTouch on Etsy,   Organza allows the scent to come through very well, yet keeps the loose pieces contained.   The organza bags are filled with fresh lavender buds, tied, labeled and sold from my local spaces.

ORGANZA BAGS FILLED WITH LAVENDER BUDS ~ by Gereanna's

Oh, by the way, did you know that Lavender is one of the few scents that a newborn baby’s brain is able to process?  Lavender is known in the organic health industry for the calming effects it has on human beings.  Lavender scent is added to baby products, as well as being used as an anti-anxiety remedy in massage oils and other theraputic products.  Lavender is a top contender in the herbal family.

 Lavender Sachet the Easy Way ~

I did it!  You can too!

~Gerean

Your feedback and comments are welcome!

Please feel free to post about your own projects too !
Join me on Facebook at:  http://www.facebook.com/pages/Gereannas/102262306512254